
How to Measure a Poly Mailer for Shipping? – 3 Easy Steps
For e-commerce sellers, choosing the right packaging is not only about product safety, but also directly impacts shipping costs. If you frequently ship using poly mailers, you have likely encountered situations where you managed to squeeze an item in only to find the seal won’t close, or the bag was too large, causing the item to shift violently or even get damaged in transit.
To avoid these awkward situations and unnecessary losses, mastering the correct measuring method is crucial. This article breaks down step-by-step how to measure a poly mailer for shipping, helping you bid farewell to size troubles, save money, and gain peace of mind.
Why Choosing the Right Poly Mailer Size Matters?
Before diving into measuring, we need to understand why precise sizing is essential:
Save on Shipping Costs: Carriers typically charge based on dimensional weight or actual weight. Using an oversized poly mailer not only wastes space but can also result in higher shipping fees.
Protect Your Products: A properly sized poly mailer wraps snugly around the item, preventing severe friction or shifting during transit.
Enhance the Buyer Experience: Neat, fitted packaging delivers a more professional unboxing experience for your customers.
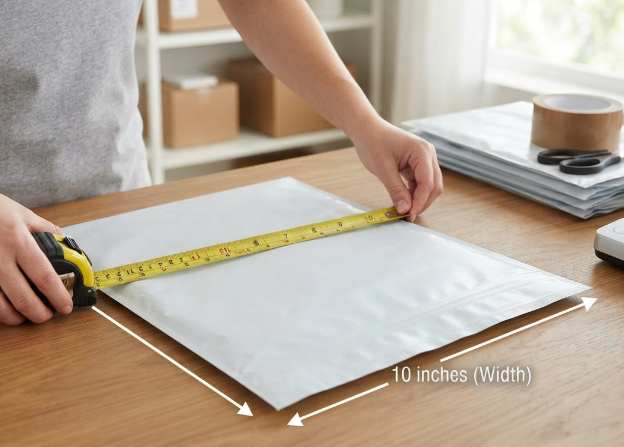
3 Simple Steps: How to Measure for a Poly Mailer?
Measuring a poly mailer is simple; all you need is a tape measure. Before getting started, keep this core principle in mind: Products have thickness, and thickness directly “eats into” both the length and width of the poly mailer. Ignoring thickness is the number one culprit behind buying the wrong size bags that fail to seal properly.
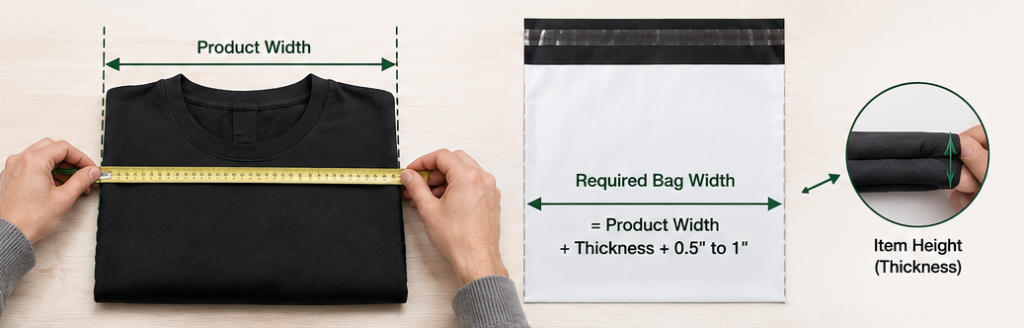
Step 1: Measure the Width
Place the item to be packaged flat on a table and use a tape measure to find its widest point.
Golden Calculation Formula: Product Width + Item Height (Thickness) + 0.5 to 1 inch (approx. 1.2 – 2.5 cm)
Why Reserve This Space? This extra room provides side clearance for the product’s thickness. If the dimensions are calculated too tightly, the sides of the bag will be stretched too taut once the item is inside. This makes sealing extremely difficult and increases the risk of the seal tearing due to high tension during transit.
Step 2: Measure the Length
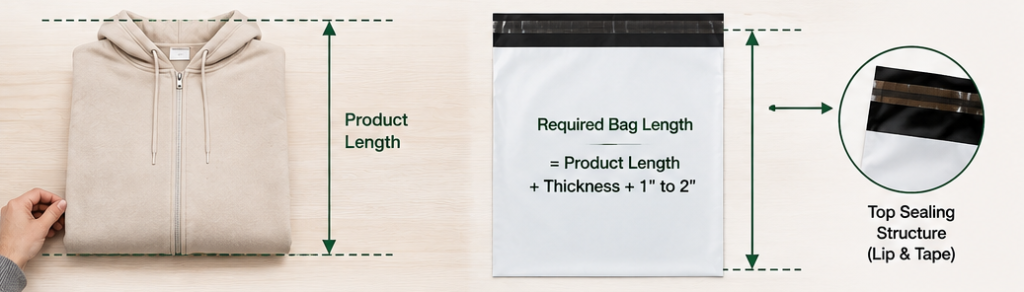
Measure the longest part of the product and factor in the top sealing structure.
Golden Calculation Formula: Product Length + Item Height (Thickness) + 1 to 2 inches (approx. 2.5 – 5 cm)
Why Reserve This Space? Standard poly mailers typically feature a lip and tape closure at the top. You need to leave enough physical length above the item so you can fold the opening smoothly and pull the adhesive strip across to seal it securely.
Step 3: Pay Special Attention to “Fluffy Thickness”
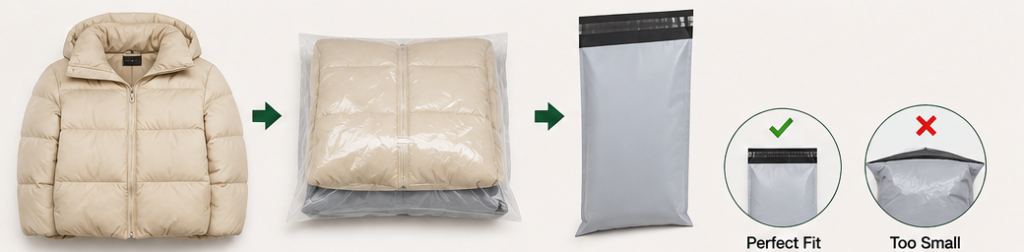
If you are shipping bulky, airy items (such as winter hoodies, plush toys, down jackets, or pillows), these items are full of air before being compressed, which will heavily consume the flat dimensions of the bag.
Recommendation: For heavy or fluffy items, it is recommended to add an extra 1 inch of redundancy on top of the calculated length and width, or choose a gusseted poly mailer with expanding bottom folds to ensure a smooth and effortless packing process.
Practical Case Study: What Size Should You Choose for a Folded T-Shirt?
To better understand the measurement formulas above, let’s walk through a practical sizing scenario using a standard folded T-shirt.
Case Data Setup
Suppose your packaged folded T-shirt has the following dimensions:
- Width: 10″
- Length: 12″
- Thickness: 1″
Size Calculation Process
Using the golden formula mentioned earlier, calculate the required poly mailer size:
Bag Width Calculation: Product Width (10″) + Thickness (1″) + Allowance (2″) = 13″
Bag Height Calculation: Product Length (12″) + Thickness (1″) + Allowance (2″) = 15″
Recommended Selection
Through precise calculation, the most matching poly mailer specification for this T-shirt is a 13“ × 15“ Poly Mailer. This size allows the clothing to fit flat and neatly while making it easy to pull the self-sealing strip for a secure closure.
Tip: How to choose for thick coats and hoodies?
If you are shipping bulkier hoodies, sweaters, or winter coats, their fluffy fibers and significantly increased thickness will make standard flat mailers difficult to use. In this case, it is recommended to upgrade to a larger specification (such as 14.5″ × 19″) or choose a gusseted poly mailer to ensure a smooth and efficient packaging process.
Common E-Commerce Items and Poly Mailer Size Reference Table
To help you find the right fit quickly, here is a reference table of recommended poly mailer sizes for common e-commerce goods:
| Item Type | Suggested Size | Applicable Scenarios |
| T-Shirts / Light Apparel | 6 × 9″ or 9 × 12″ | Suitable for single summer garments or lightweight textiles. |
| Hoodies / Sweaters / Multiple Items | 10 × 13″ or 12 × 15.5″ | Suitable for winter clothing with some thickness. |
| Books / Documents / Magazines | 9 × 12″ | Flat paper goods with regular edges. |
| Shoes in Box / Large Items | 14 × 19″ or larger | Note that when shipping with a shoebox, you must measure the entire shoebox. |
| Small Accessories / Phone Cases | 4 × 8″ or 6 × 9″ | Bubble mailers with bubble lining are recommended. |
Common Mistakes and Pitfalls When Measuring Poly Mailers
In practical operations, both novice e-commerce sellers and experienced warehouse procurement teams often fall into traps when measuring and selecting poly mailers. Understanding and avoiding these common mistakes will save your team significant time and packaging costs.
1. Measuring a Poly Mailer After It’s Filled
Common Mistake: For a visual reference, people often grab an old, stuffed bag to measure its dimensions or stretch the bag to match the product.
Negative Consequence: Plastic materials deform when stretched and stuffed. Data measured this way is completely distorted, and newly purchased empty bags will often turn out too small.
Correct Approach: Always measure a flat, empty bag. Do not pull or stretch the bag while measuring; ensure the surface lies naturally flat.
2. Completely Ignoring Product “Thickness” in Calculations
Common Mistake: Measuring only the flat length and width (a 2D perspective) while completely forgetting about height/thickness.
Negative Consequence: On paper, the dimensions look just right. However, when a thick item is inserted, the thickness instantly eats up a massive portion of the length and width margins. At best, this distorts the bag and makes the sides overly taut; at worst, the item won’t fit at all, or the bag splits at the seams during sealing.
Correct Approach: Always factor thickness into your calculation formula to ensure sufficient three-dimensional space is reserved.
3. Equating the “Whole Bag” to “Usable Loading Space”
Common Mistake: Believing that buying a 10″ × 13″ bag means the full 10 × 13 inch area can be packed with products.
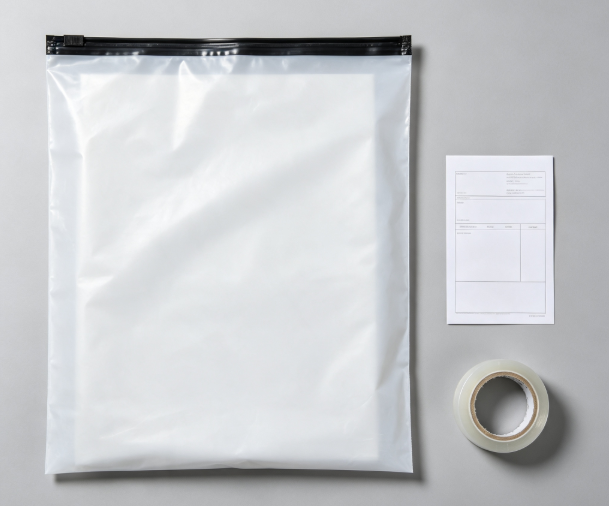
Negative Consequence: Poly mailers usually feature a lip and tape closure at the top, which must be folded and adhered and cannot hold cargo. Additionally, the heat-sealed edges on all four sides consume part of the width.
Correct Approach: Deduct the length of the sealing flap when calculating, and reserve 1 to 2 inches of clearance to ensure items can be pushed smoothly to the bottom and sealed perfectly.
4. Trying to Use One Size for All Products (Lack of Specification Planning)
Common Mistake: To keep things simple, warehouses stock only one or two large universal poly mailers, using them for everything from a lightweight T-shirt to a small booklet.
Negative Consequence: Oversized bags cause products to shift violently during transit, increasing the risk of collision damage. They also generate unnecessary dimensional weight shipping fees due to inflated package volume, silently eating away at profits.
Correct Approach: Establish a refined size-matching matrix for items of different volumes, pairing small accessories, T-shirts, and hoodies with dedicated specifications. This enhances unboxing aesthetics while driving logistics costs down to a minimum.
How to Comprehensively Reduce E-Commerce Shipping and Fulfillment Costs?
Accurately measuring and selecting poly mailer sizes is only the first step in optimizing logistics costs. For e-commerce sellers pursuing profit maximization, further reducing shipping expenses in a fiercely competitive market requires optimization across five key dimensions:
1. Choose Poly Mailers That Closely Fit Product Dimensions
Optimization Logic: Many carriers (such as DHL, FedEx, UPS, etc.) charge based not only on actual weight but also on dimensional weight. If packaging is significantly larger than the product, systems will bill you for empty air.
Execution Method: Move away from the sloppy “one-size-fits-all large bag” approach. Match every primary product line with its most compact packaging bag to eliminate excess air volume and directly lower package size tiers and shipping rates.
2. Reduce Internal Packaging Void Space (Reject Over-Packaging)
Optimization Logic: Internal gaps not only generate unnecessary dimensional weight but also cause products to shift and collide repeatedly during transit, leading to high return and damage rates.
Execution Method: When minor gaps are unavoidable, pair items smartly or use lightweight cushioning materials (such as honeycomb paper or bubble wrap) for fragile goods. Maximize package “slimness” while ensuring absolute product safety.
3. Use Lightweight Packaging Materials
Optimization Logic: Tare weight, the weight of the packaging itself, is factored into total shipping costs. Using thick, low-quality packaging materials is essentially paying for useless weight.
Execution Method: Prioritize high-quality, high-tensile, ultra-thin, lightweight co-extruded poly mailers. Compared to traditional thick plastic bags or cardboard boxes, premium lightweight poly mailers significantly reduce single-package net weight without sacrificing tear and water resistance, adding up to massive postage savings over time.
4. Establish a Refined Packaging Specification Matrix
Optimization Logic: A single packaging size inevitably leads to massive space waste for smaller items.
Execution Method: Scientifically plan and stock 3 to 5 distinct poly mailer specifications based on your core product lines (e.g., small accessories, single T-shirts, heavy hoodies, long document mailers). Let every category find its precise match, eliminating waste from over-sizing right at the source.
5. Bulk Customize Exclusive Packaging Sizes and Brand Identity
Optimization Logic: Purchasing standard universal bags sporadically from suppliers long-term not only drives up unit costs but fails to build brand recognition.
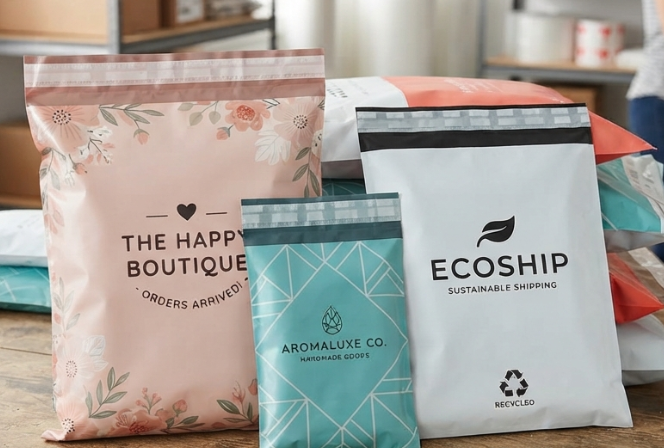
Execution Method: Once business scales to a certain stage, look directly to quality source manufacturers for customized poly mailers. Customizing exclusive sizes guarantees a 100% fit, eliminating trimming and redundant space. At the same time, printing your brand logo and VI colors onto the bag drives down unit procurement costs via economies of scale while delivering an upscale unboxing experience to customers, achieving a win-win of cost reduction and brand premium.
Conclusion
Correctly measuring a poly mailer is simple, yet it significantly boosts packaging efficiency, lowers logistics costs, and improves customer delivery experiences. Before purchasing, accurately measure your product’s width, height, and thickness, choose the right poly mailer size based on actual needs, and leave appropriate space for sealing and loading.
If you need to customize poly mailers, consider working with an experienced packaging manufacturer like Shine Pack to receive professional size recommendations and tailored solutions based on your product dimensions, shipping methods, and brand needs. Whether for e-commerce logistics, apparel packaging, or brand retail, choosing the right poly mailer helps you achieve a safer, more efficient, and high-value packaging solution.